Great Wall Hover. Manual - part 46


  Index      Great Wall     Great Wall Hover - service repair manual


Search            copyright infringement  


Content   ..  44  45  46  47   ..


Great Wall Hover. Manual - part 46


d.  Tighten the adjusting bolt to make the extension length of the bolt

equal to the length before remove.

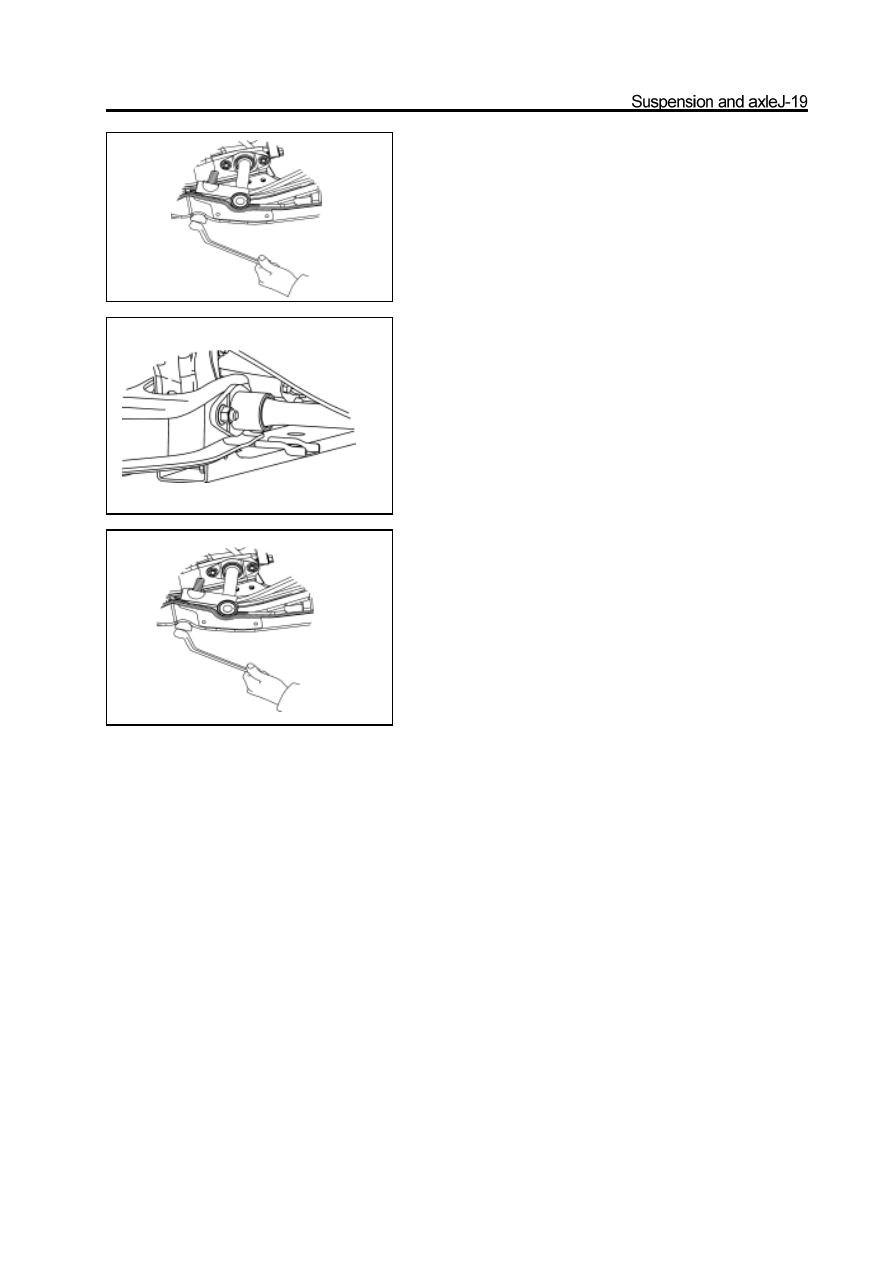
2. For new torsion bar spring

a. Remove the wheel.

b. Coat thin grease on the spline of the torsion bar spring.

c. Install the torsion bar spring on the torsion bar base.

d.  Lower the lower arm to the lower limitation position; install the

 adjusting arm in the torsion bar spring with the angle that the

 adjusting bolt just can be screwed on the upper adjusting block.

e. Tighten the adjusting bolt to the specified torque.

N u t   t i g h t e n i n g   l i m i t a t i o n :  A  i s   a b o u t   3 0 - 3 5 m m ;   i f  A >

 35mm, then it is adjusted through height of adjusting arm.

f. Install the wheel; remove the bracket; bounce the vehicle for

several times to make the suspension enters into the stable

status.

g. Rotate the adjusting bolt and adjust the ground clearance of

chassis (Refer to 4-Wheel Alignment).

2. Disconnect the vibration damper from the lower

    arm.

3. Disassembly of torsion bar spring

    (Refer to Section “Torsion Bar Spring”)

Lower suspension arm

Removal of lower suspension arm

1. Disconnect the connecting rod of stabilizer bar

    from the lower arm

     a.  Use the jack to support the lower arm.

  b. Remove the connecting nut; disconnect the connecting rod of

      sta bilizer bar form the lower  arm.

5. Remove the front shaft of lower arm

     a. Make the mark on the adjusting cam.

special tools

      b.Remove the nut and front shaft of lower arm.

6. Remove the rear shaft of lower arm

     Screw off the nut; remove the rear shaft of lower arm shaft; remove the

     lower suspension arm.

Replacement of lower suspension arm bush

1. Removal of short bush of lower suspension arm

Use the special tools to press the short bush from the lower arm.

2. Installation of short bush of lower suspension arm

Use the special tools to press the new short bush in the lower arm.

Remarks: Do not coat the bush with the grease.

special tools

special tools

3. Removal of long bush of lower suspension arm

Use the special tools to remove the long bush.

special tools

4. Installation of longbushoflowersuspensionarmUse

the special tools to install the new bush.

Remarks: Do not coat the bush with the grease.

Installation of lower suspension arm

1. Installation of lower suspension arm

a. Install the rear shaft of lower arm and tighten the nut to the

specified torque.

Tightening force: 290

25N

m

b. Install the front shaft of lower arm and screw on the nut

temporarily.

2. Installation of front hub and steering knuckle

    assem bly

(Refer to section “Front Hub and Steering Knuckle”)

3. Install the vibration damper on the lower suspension

    arm.

Install the vibration damper on the lowersuspensionarmbracket.

Tightening force: 90

10N

m

4. Connect the stabi lizerbar to the lower suspension

    arm

Tightening force: 63

5N

m

special tools


Content   ..  44  45  46  47   ..