Fiat 500L Living (2022 year). Manual in english - page 1
12
DASHBOARD
The presence and position of controls, instruments and gauges may vary depending on the versions. On some versions, the
dashboard and controls may be backlit.
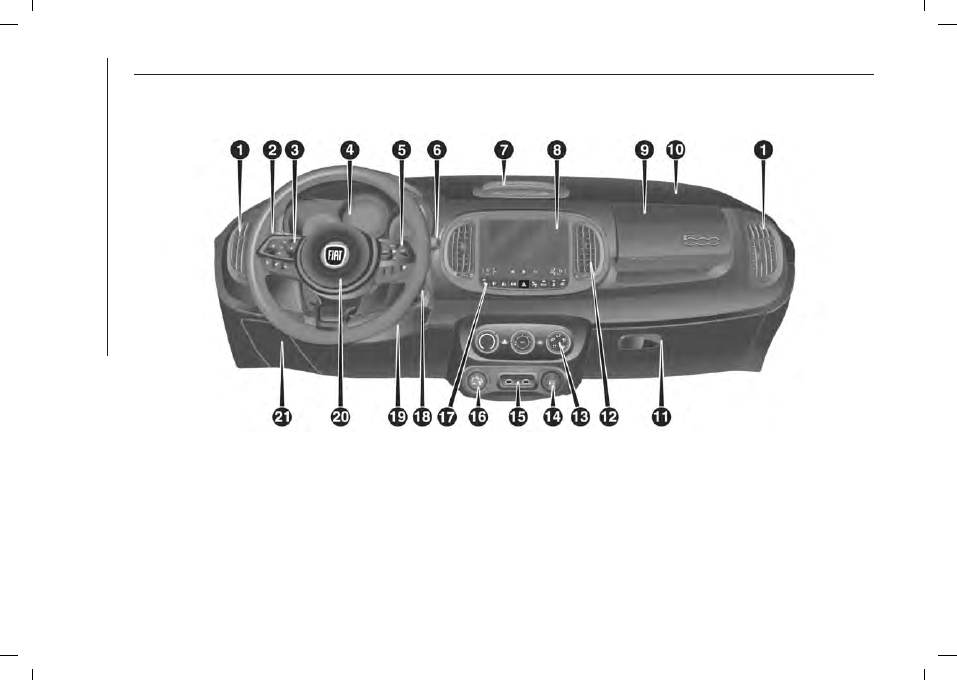
1
F0Y0723
1. Adjustable and directable air diffusers 2. Exterior light control stalk 3. Controls on the steering wheel: Setup menu and
interaction with
Uconnect™
system. 4. Instrument panel 5. Controls on the steering wheel: Cruise Control, Speed Limiter
6. Windscreen/rear window wiper lever 7. Fixed upper air vent 8.
Uconnect™
system 9. Upper storage compartment 10.
Passenger front airbag 11. Lower compartment box 12. Adjustable and directable central air vents 13. Manual climate control
(for versions/markets, where provided) or automatic dual zone climate control (for versions/markets, where provided) 14. Cigar
lighter (for versions/markets, where provided) 15. USB ports (the number of USB ports may vary according to the trim level) 16.
Mode Selector 17. Control buttons 18. Ignition device 19. Driver knee bag (for versions/markets, where provided) 20. Driver
front airbag 21. Dashboard fusebox access flap