Dodge Caliber. Manual - part 13
SEAL-LOWER BALL JOINT
REMOVAL
CAUTION: This procedure is designed to be used only if a seal boot is damaged during related service
procedures. It is not to be used as a repair procedure for a cut seal boot on a vehicle that has been driven
and exposed to road and weather conditions.
1. Remove the lower control arm from the vehicle.
(Refer to 2 - SUSPENSION/FRONT/LOWER CON-
TROL ARM - REMOVAL)
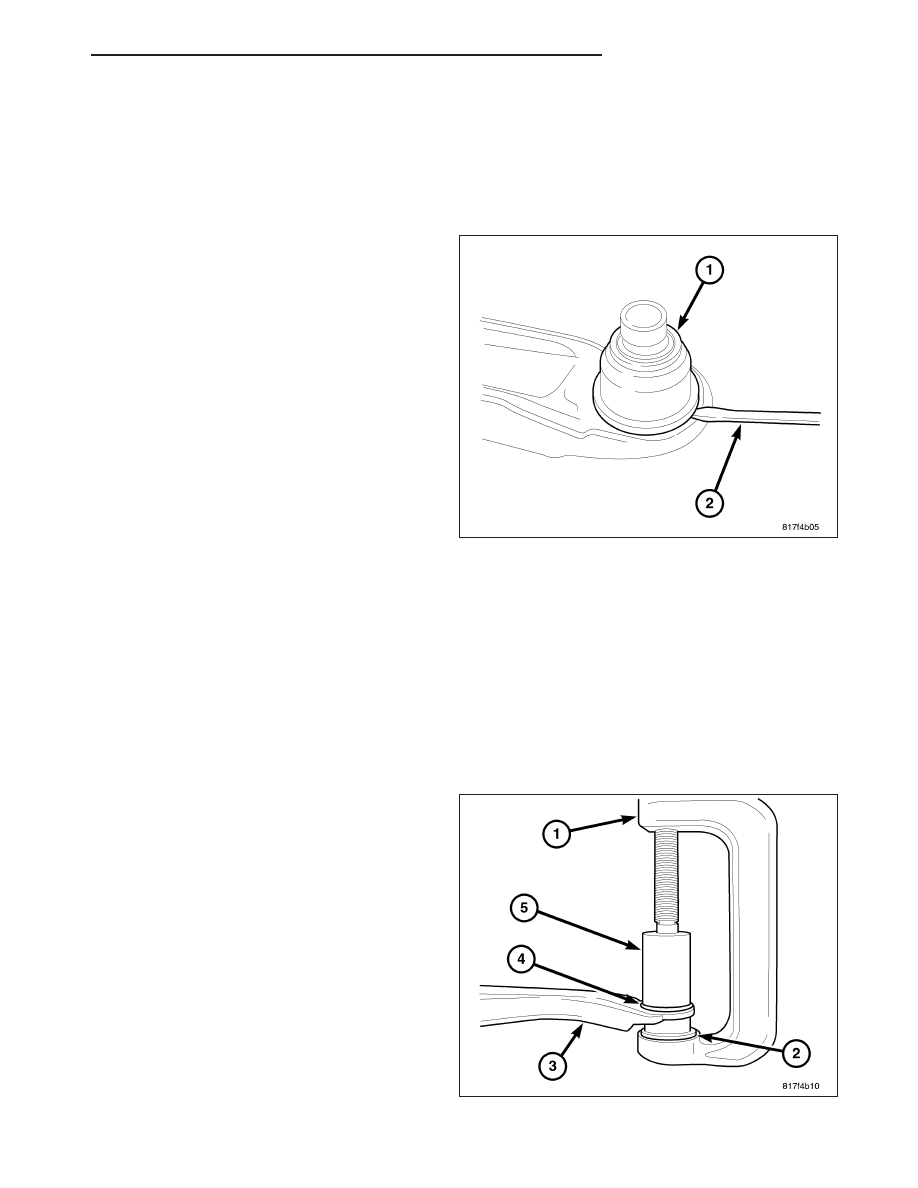
2. Using a screwdriver or other suitable tool (2), pry
the seal boot (1) off of the ball joint.
INSTALLATION
CAUTION: This procedure is designed to be used only if a seal boot is damaged during related service
procedures. It is not to be used as a repair procedure for a cut seal boot on a vehicle that has been driven
and exposed to road and weather conditions.
1. Place a liberal dab of Mopar
T
Multi-Mileage Lube (No more than 10g) or equivalent around the base of the ball
joint stud at the socket.
2. Position the ball joint stud straight up.
3. Place the NEW ball joint seal boot over the ball joint stud.
4. By hand, start the seal boot over the sides of the ball joint.
CAUTION: Prior to installing the sealing boot
using Remover/Installer, Special Tool 6289-4, make
sure there are no burrs on the inside of the tool.
Remove any burrs and lubricate with a small
amount of Mopar
T
Multi-Mileage Lube or equiva-
lent.
5. Place Remover/Installer, Special Tool 6289-4, onto
the screw-drive of Ball Joint Press, Special Tool
C-4212F.
6. Place
Remover/Installer,
Special
Tool
6289-6,
angle-cut end up into the cup of Ball Joint Press,
Special Tool C-4212F. Before tightening the set,
turn the Remover/Installer so that the tallest point
of the angle-cut is away from the body of the con-
trol arm when installing the seal boot.
7. Place the control arm ball joint into Remover/In-
staller 6289-6. Rotate the arm left or right until the
tallest point of the angle cut on the Remover/Installer is away from the body of the control arm.
PM
FRONT SUSPENSION
2 - 17