Chrysler Le Baron, Dodge Dynasty, Plymouth Acclaim. Manual - part 156
bottom trunk lid to hinge attaching bolts. Separate
the trunk lid from the vehicle.
INSTALLATION
Reverse the preceding operation.
TRUNK LID HINGE
REMOVAL (FIG. 54)
(1) Remove rear deck filler panel.
(2) Disconnect trunk lid lift torsion bars from
hinges.
(3) Mark all attaching bolt, nut, and component lo-
cations with a suitable marking device. Use marks
as a reference when installing hinge.
(4) Remove bolts holding trunk lid to hinge.
(5) Remove nuts and bolts holding hinge to closure
panel below rear window glass.
(6) Separate hinge from vehicle.
INSTALLATION
Reverse the preceding operation.
TRUNK LID TORSION BAR
REMOVAL (FIG. 54)
(1) Raise and support trunk lid in the full up posi-
tion.
(2) Remove trunk lining as necessary to gain ac-
cess to torsion bars.
(3) Disengage adjusting end of torsion bar from the
slot in the tension adjustment bracket.
(4) Pivot torsion bar out of lift arm swivel.
(5) Disconnect torsion bar from hinge.
INSTALLATION
Reverse the preceding operation.
TRUNK LID LATCH
REMOVAL (FIG. 55)
(1) Raise trunk lid to the full up position.
(2) Remove screws holding trim cover to latch and
separate cover from vehicle.
(3) Disconnect remote release cable from latch.
(4) Disconnect trunk lock linkage rod from trunk
latch, on AA-P and D models.
(5) Remove bolts holding latch to trunk lid and
separate latch from vehicle.
INSTALLATION
Insert trunk lock chill into latch release driver, on
AA-C models and reverse the preceding operation.
TRUNK LID LOCK
REMOVAL (FIG. 56)
AA-P/D MODELS
(1) Remove trunk lid tail light assembly. Refer to
Group 8L, Lamps for proper procedures.
(2) Remove screws holding latch release linkage
cover to trunk lid and separate cover from vehicle.
(3) Disconnect linkage rod from lock cylinder lever.
(4) Remove nut holding lock cylinder to trunk lid
and separate lock from vehicle.
INSTALLATION
Reverse the preceding operation.
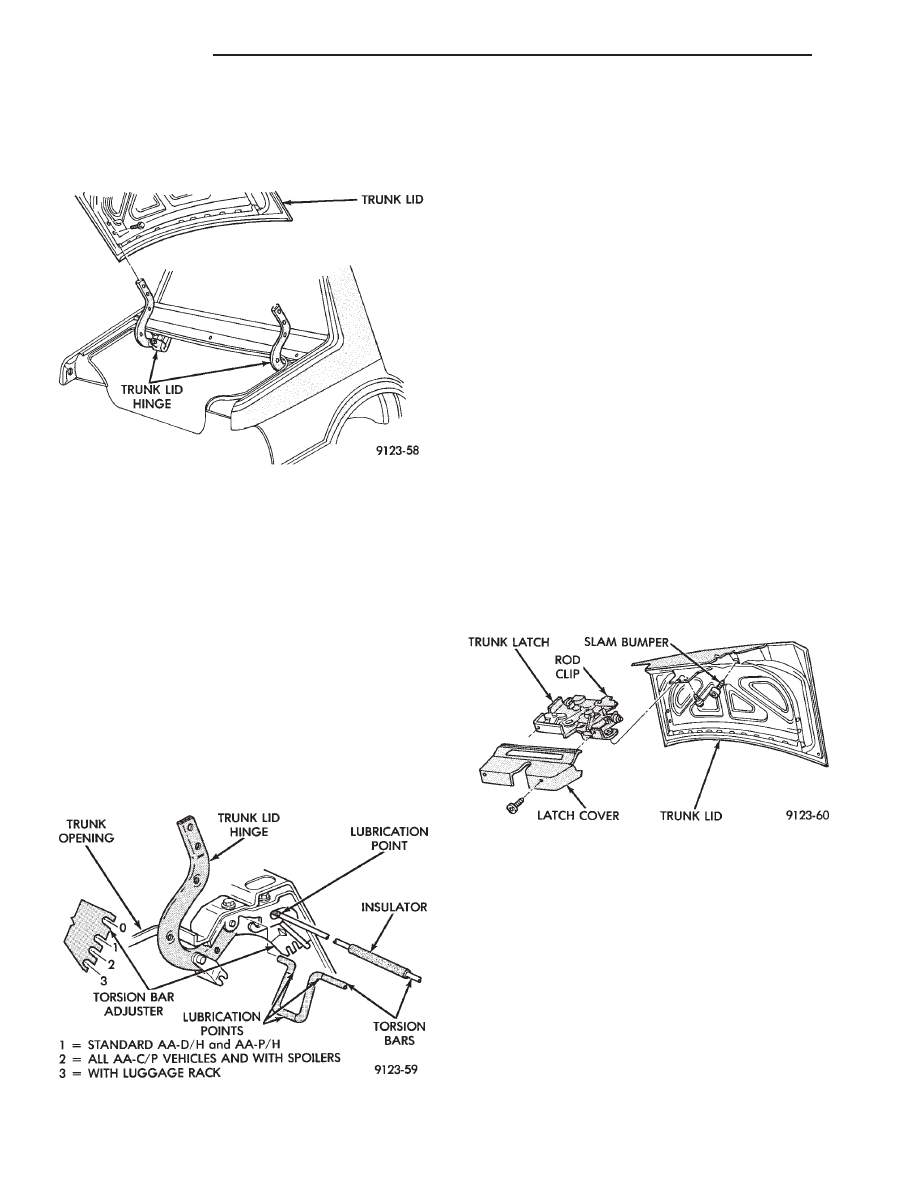
Fig. 53 Trunk Lid
Fig. 54 Trunk Lid Hinge
Fig. 55 Trunk Lid Latch
23 - 34
AA-BODY
Ä