DAF 95XF. Manual - part 545
EXPLANATORY NOTES ON THE MAINTENANCE ACTIVITIES
Inspection and adjustment
3-56
LEADING REAR AXLE 09N044 (FTP-TYPE VEHICLES)
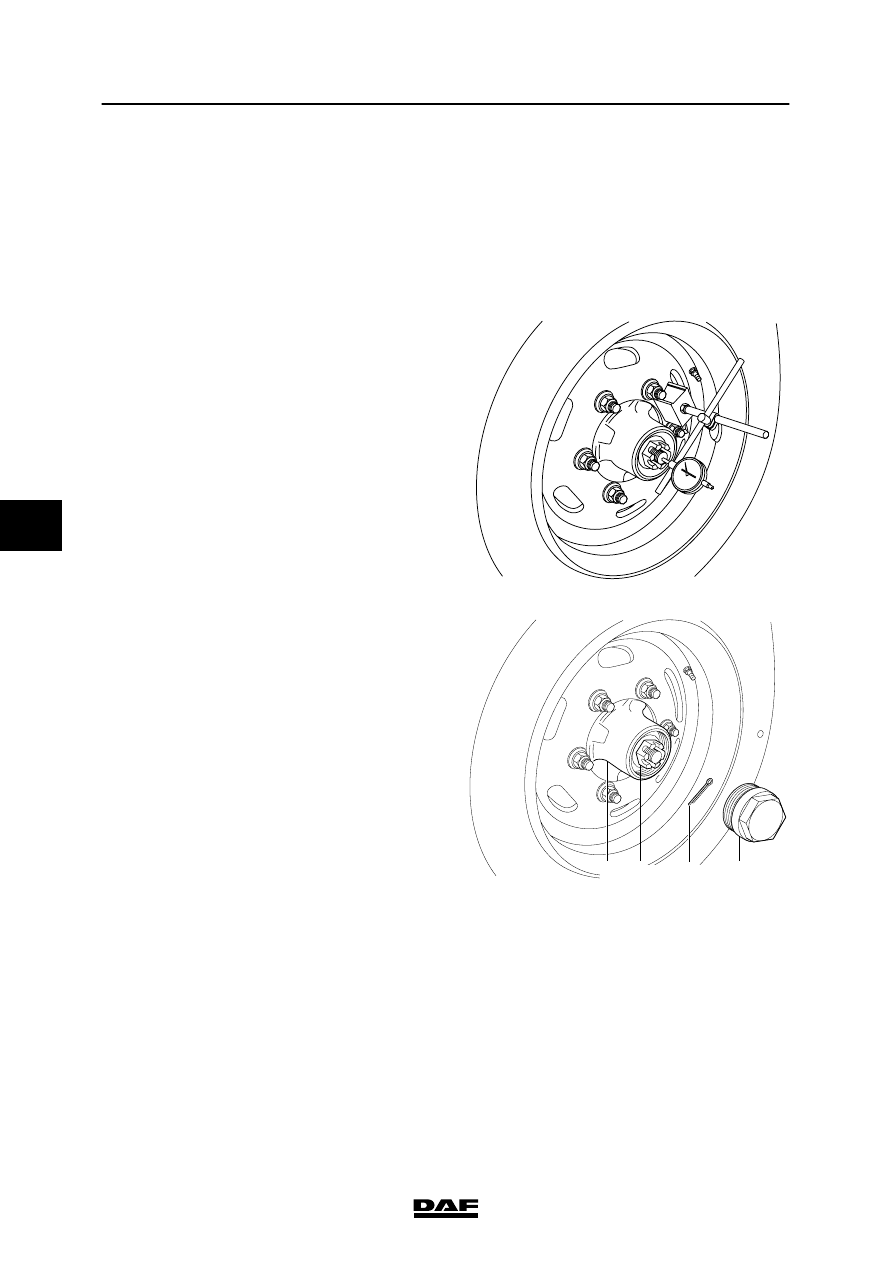
Checking the wheel bearing play
1.
Remove the hub cap using special tool
(DAF no. 1329498).
2.
Lift the leading rear axle and support it
properly.
3.
Release the brakes.
4.
Fit a dial gauge and let the stylus rest
against the axle journal.
5.
Push and pull on the wheel. Read the value
off the gauge. Compare this reading to the
specified value, see “Technical data”. If the
reading falls outside the tolerance range,
the wheel bearing play should be
re-adjusted.
6.
Fit the hub cap. Tighten the hub cap to the
specified torque using the special tool (DAF
no. 1329498). See “Technical data”.
7.
Adjust the brakes.
S7 00 635
Adjusting the wheel bearing play
1.
Remove the hub cap (4) using special tool
(DAF no. 1329498).
2.
Lift the leading rear axle.
3.
Release the brakes.
4.
Remove the split pin (3) from the hub
nut (2).
5.
Tighten the lock nut to the specified
tightening torque, see “Technical data”. Turn
the wheel at least 5 revolutions
anti-clockwise and then 5 revolutions
clockwise while fixing the hub nut.
6.
Check that the wheel rotates smoothly.
7.
Turn back the hub nut until the split pin can
be fitted. Fit a new split pin.
S7 00 657
1
2
3
4
5
200424