RAM C/V (2013 year). Manual - part 7


  Index      RAM     RAM C/V (2013 year) - manual in english


Search            copyright infringement  


Content      ..     5      6      7      8     ..


RAM C/V (2013 year). Manual - part 7


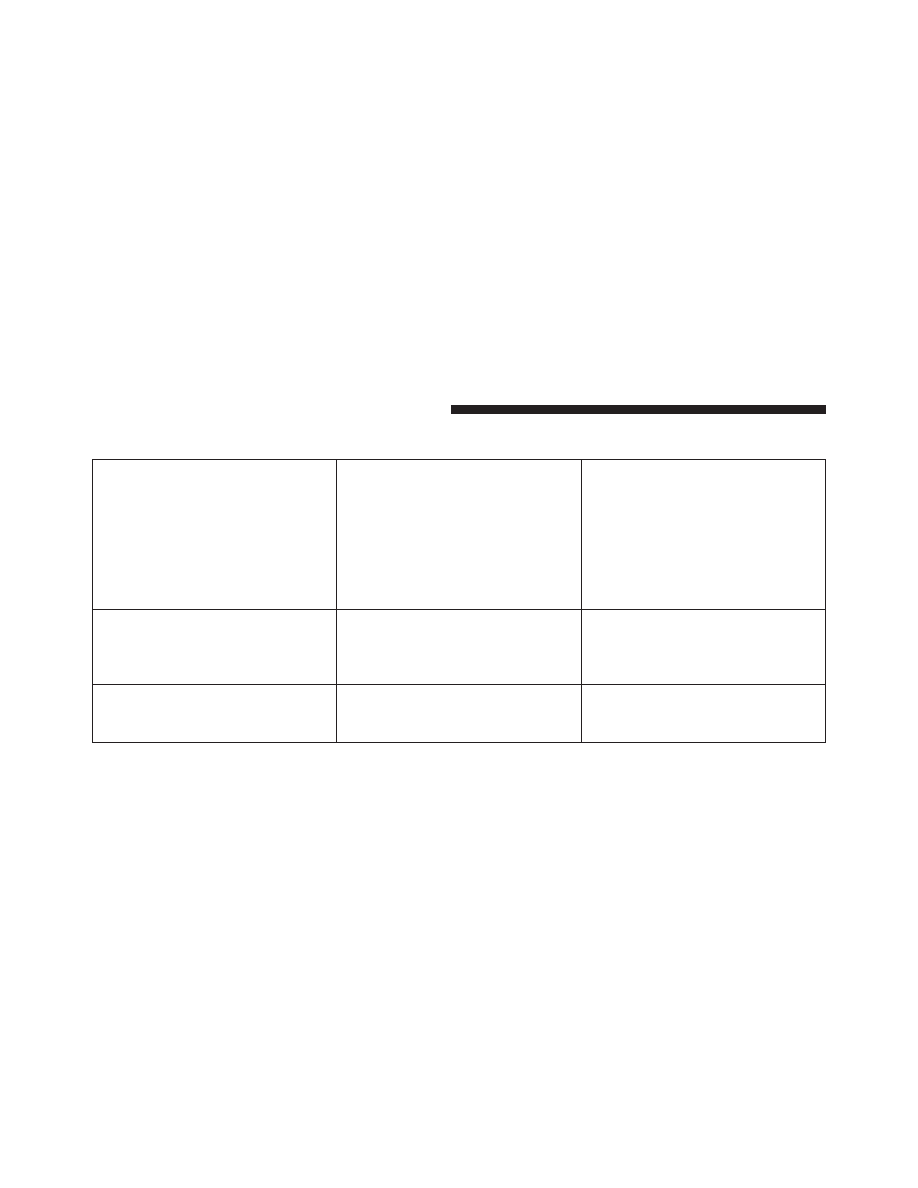
Child Restraint LATCH Positions

What is the weight limit (child’s
weight + weight of the child re-
straint) for using the LATCH an-
chorage system to attach the child
restraint?

65 lbs (29.5 kg)

Use the LATCH anchorage system

until the combined weight of the

child and the child restraint is

65 lbs (29.5 kg). Use the seat belt

and tether anchor instead of the

LATCH system once the combined

weight is more than 65 lbs

(29.5 kg).

Can the LATCH anchorages and

the seat belt be used together to

attach a rear-facing or forward-

facing child restraint?

No

Do not use the seat belt when you

use the LATCH anchorage system
to attach a rear-facing or forward-

facing child restraint.

Can a child seat be installed in the

center position using the inner

LATCH lower anchorages?

N/A

100

THINGS TO KNOW BEFORE STARTING YOUR VEHICLE

-------------------------------------------------------------------------------------------------------------------------------------------------------------

Can two child restraints be at-
tached using a common lower

LATCH anchorage?

No

Never “share” a LATCH anchorage

with two or more child restraints.

If the center position does not have

dedicated LATCH lower anchor-

ages, use the seat belt to install a

child seat in the center position

next to a child seat using the

LATCH anchorages in an outboard

position.

Can the rear-facing child restraint

touch the back of the front passen-

ger seat?

Yes

The child seat may touch the back

of the front passenger seat if the

child restraint manufacturer also

allows contact. See your child re-

straint owner’s manual for more

information.

Can the head restraints be re-

moved?

Yes; second row outboard posi-

tions only, third row all positions.

2

THINGS TO KNOW BEFORE STARTING YOUR VEHICLE

101

-------------------------------------------------------------------------------------------------------------------------------------------------------------

Locating The LATCH Anchorages

The lower anchorages are round bars that are
found at the rear of the seat cushion where it
meets the seatback. They are just visible when
you lean into the rear seat to install the child

restraint. You will easily feel them if you run your finger
along the gap between the seatback and seat cushion.

LATCH Anchorages (Second Row Anchorages Shown)

102

THINGS TO KNOW BEFORE STARTING YOUR VEHICLE

-------------------------------------------------------------------------------------------------------------------------------------------------------------

Locating The LATCH Anchorages

In addition, there are tether strap anchors lo-
cated behind each rear seatback, near to the
floor.

LATCH Anchorages (Third Row 60/40 Anchorages

Shown)

LATCH Anchorages (Third Row 60/40 Anchorage

Shown)

2

THINGS TO KNOW BEFORE STARTING YOUR VEHICLE

103

-------------------------------------------------------------------------------------------------------------------------------------------------------------

LATCH-compatible child restraint systems will be
equipped with a rigid bar or a flexible strap on each side.
Each will have a hook or connector to attach to the lower
anchorage and a way to tighten the connection to the
anchorage. Forward-facing child restraints and some
rear-facing infant restraints will also be equipped with a
tether strap. The tether strap will have a hook at the end
to attach to the top tether anchorage and a way to tighten
the strap after it is attached to the anchorage.

Center Seat LATCH – Commercial Cargo Vehicles
(No Factory Installed Rear Seats) — If Equipped

WARNING!

This vehicle does not have a center seating position.
Do not use the center lower LATCH anchorages to
install a child seat in the center of the back seat.

Always follow the directions of the child restraint manu-
facturer when installing your child restraint. Not all child
restraint systems will be installed as described here.

104

THINGS TO KNOW BEFORE STARTING YOUR VEHICLE

-------------------------------------------------------------------------------------------------------------------------------------------------------------

Center Seat LATCH

If a child restraint installed in the center position blocks
the seat belt webbing or buckle for the outboard position,
do not use that outboard position. If a child seat in the
center position blocks the outboard LATCH anchors or
seat belt, do not install a child seat in that outboard
position.

WARNING!

Never use the same lower anchorage to attach more
than one child restraint. Please refer to “Installing
The LATCH-Compatible Child Restraint System” for
typical installation instructions.

Always follow the directions of the child restraint manu-
facturer when installing your child restraint. Not all child
restraint systems will be installed as described here.

To Install A LATCH-compatible Child Restraint

1. If the selected seating position has a Switchable Auto-

matic Locking Retractor (ALR) seat belt, stow the seat
belt, following the instructions below. See the section
“Installing Child Restraints Using the Vehicle Seat
Belt” to check what type of seat belt each seating
position has.

2. Loosen the adjusters on the lower straps and on the

tether strap of the child seat so that you can more
easily attach the hooks or connectors to the vehicle
anchorages.

3. Place the child seat between the lower anchorages for

that seating position. For some second row seats, you
may need to recline the seat and / or raise the head
restraint to get a better fit.

2

THINGS TO KNOW BEFORE STARTING YOUR VEHICLE

105

-------------------------------------------------------------------------------------------------------------------------------------------------------------

4. Attach the lower hooks or connectors of the child

restraint to the lower anchorages in the selected seat-
ing position.

5. If the child restraint has a tether strap, connect it to the

top tether anchorage. See the section “Installing Child
Restraints Using the Top Tether Anchorage” for direc-
tions to attach a tether anchor.

6. Tighten all of the straps as you push the child restraint

rearward and downward into the seat. Remove slack
in the straps according to the child restraint manufac-
turer’s instructions.

7. Test that the child restraint is installed tightly by

pulling back and forth on the child seat at the belt
path. It should not move more than 1 inch (25.4 mm)
in any direction.

How To Stow An Unused ALR Seatbelt

When using the LATCH attaching system to install a
child restraint, stow all ALR seat belts that are not being
used by other occupants or being used to secure child
restraints. An unused belt could injure a child if they play
with it and accidentally lock the seatbelt retractor. Before
installing a child restraint using the LATCH system,
buckle the seat belt behind the child restraint and out of
the child’s reach. If the buckled seat belt interferes with
the child restraint installation, instead of buckling it
behind the child restraint, route the seat belt through the
child restraint belt path and then buckle it. Do not lock
the seatbelt. Remind all children in the vehicle that the
seat belts are not toys and that they should not play with
them.

106

THINGS TO KNOW BEFORE STARTING YOUR VEHICLE

-------------------------------------------------------------------------------------------------------------------------------------------------------------

WARNING!

Improper installation of a child restraint to the
LATCH anchorages can lead to failure of the re-
straint. The child could be badly injured or killed.
Follow the child restraint manufacturer’s directions
exactly when installing an infant or child restraint.

Installing Child Restraints Using The Vehicle Seat
Belt

The seat belts in the passenger seating positions are
equipped with either a Switchable Automatic Locking
Retractor (ALR) or a cinching latch plate or both. Both
types of seat belts are designed to keep the lap portion of

the seat belt tight around the child restraint so that it is
not necessary to use a locking clip. The ALR retractor can
be “switched” into a locked mode by pulling all of the
webbing out of the retractor and then letting the webbing
retract back into the retractor. If it is locked, the ALR will
make a clicking noise while the webbing is pulled back
into the retractor. For additional information on ALR,
refer to the “Automatic Locking Mode” description un-
der “Occupant Restraints.” The cinching latch plate is
designed to hold the lap portion of the seatbelt tight
when webbing is pulled tight and straight through a
child restraint’s belt path. Please see the table below and
the following sections for more information about both
types of seat belts.

2

THINGS TO KNOW BEFORE STARTING YOUR VEHICLE

107

-------------------------------------------------------------------------------------------------------------------------------------------------------------

Lap/Shoulder Belt Systems for Installing Child
Restraints in this Vehicle

Second Row Captains Chair

Second Row Bench

108

THINGS TO KNOW BEFORE STARTING YOUR VEHICLE

-------------------------------------------------------------------------------------------------------------------------------------------------------------

Lap/Shoulder Belt Systems

What is the weight limit (child’s weight +
weight of the child restraint) for using the
Tether Anchor with the seat belt to attach a
forward facing child restraint?

Weight limit of the

Child Restraint

Always use the tether anchor when using

the seat belt to install a forward facing

child restraint, up to the recommended

weight limit of the child restraint.

Can the rear-facing child restraint touch

the back of the front passenger seat?

Yes

Contact between the front passenger seat

and the child restraint is allowed, if the

child restraint manufacturer also allows

contact.

Can the head restraints be removed?

Yes; second row out-
board positions only,

third row all positions.

Can the buckle stalk be twisted to

tighten the seat belt against the belt path

of the child restraint?

Yes

In positions with cinching latch plates

(CINCH), the buckle stalk may be

twisted up to 3 full turns. Do not twist

the buckle stalk in a seating position

with an ALR retractor.

2

THINGS TO KNOW BEFORE STARTING YOUR VEHICLE

109

-------------------------------------------------------------------------------------------------------------------------------------------------------------

Installing A Child Restraint with a Switchable
Automatic Locking Retractor (ALR)

1. Place the child seat in the center of the seating

position. For some second row seats, you may need to
recline the seat and/or raise the head restraint to get a
better fit.

2. Pull enough of the seat belt webbing from the retractor

to pass it through the belt path of the child restraint.
Do not twist the belt webbing in the belt path.

3. Slide the latch plate into the buckle until you hear a

“click.”

4. Pull on the webbing to make the lap portion tight

against the child seat.

5. To lock the seat belt, pull down on the shoulder part of

the belt until you have pulled all the seat belt webbing
out of the retractor. Then, allow the webbing to retract
back into the retractor. As the webbing retracts, you
will hear a clicking sound. This means the seat belt is
now in the Automatic Locking mode.

6. Try to pull the webbing out of the retractor. If it is

locked, you should not be able to pull out any web-
bing. If the retractor is not locked, repeat step 5.

7. Finally, pull up on any excess webbing to tighten the

lap portion around the child restraint while you push
the child restraint rearward and downward into the
vehicle seat.

110

THINGS TO KNOW BEFORE STARTING YOUR VEHICLE

-------------------------------------------------------------------------------------------------------------------------------------------------------------

8. If the child restraint has a top tether strap and the

seating position has a top tether anchorage, connect
the tether strap to the anchorage and tighten the tether
strap. Refer to “Lower Anchors and Tethers for Chil-
dren (LATCH) Restraint System” for directions to
attach a tether anchor.

9. Test that the child restraint is installed tightly by

pulling back and forth on the child seat at the belt
path. It should not move more than 1 inch (25.4 mm)
in any direction.

Any seat belt system will loosen with time, so check the
belt occasionally, and pull it tight if necessary.

Installing A Child Restraint With A Cinching
Latch Plate (CINCH) — If Equipped

1. Place the child seat in the center of the seating

position. For some second row seats, you may need to
recline the seat and / or raise the head restraint to get
a better fit.

2. Next, pull enough of the seat belt webbing from the

retractor to pass it through the belt path of the child
restraint. Do not twist the belt webbing in the belt
path.

3. Slide the latch plate into the buckle until you hear a

“click.”

2

THINGS TO KNOW BEFORE STARTING YOUR VEHICLE

111

-------------------------------------------------------------------------------------------------------------------------------------------------------------

4. Finally, pull up on any excess webbing to tighten the

lap portion around the child restraint while you push
the child restraint rearward and downward into the
vehicle seat.

5. If the child restraint has a top tether strap and the

seating position has a top tether anchorage, connect
the tether strap to the anchorage and tighten the tether
strap. Refer to “Lower Anchors and Tethers for Chil-
dren (LATCH) Restraint System” for directions to
attach a tether anchor.

6. Test that the child restraint is installed tightly by

pulling back and forth on the child seat at the belt
path. It should not move more than 1 inch (25.4 mm)
in any direction.

Any seat belt system will loosen with time, so check the
belt occasionally, and pull it tight if necessary.

If the buckle or the cinching latch plate is too close to the
belt path opening of the child restraint, you may have
trouble tightening the seat belt. If this happens, discon-
nect the latch plate from the buckle and twist the short
buckle-end belt up to three full turns to shorten it. Insert
the latch plate into the buckle with the release button
facing out, away from the child restraint. Repeat steps 4
to 6, above, to complete the installation of the child
restraint.

If the belt still cannot be tightened after you shorten the
buckle, disconnect the latch plate from the buckle, turn
the buckle around one half turn, and insert the latch plate
into the buckle again. If you still cannot make the child
restraint installation tight, try a different seating position.

112

THINGS TO KNOW BEFORE STARTING YOUR VEHICLE

-------------------------------------------------------------------------------------------------------------------------------------------------------------

Installing Child Restraints Using The Top Tether
Anchorage

1. Look behind the seating position where you plan to

install the child restraint to find the tether anchorage.
You may need to move the seat forward to provide
better access to the tether anchorage. If there is no top
tether anchorage for that seating position (see the
charts above), move the child restraint to another
position in the vehicle if one is available.

2. Route the tether strap to provide the most direct path

for the strap between the anchor and the child seat. If
your vehicle is equipped with adjustable rear head
restraints, raise the head restraint, and where possible,
route the tether strap under the head restraint and
between the two posts. If not possible, lower the head
restraint and pass the tether strap around the outboard
side of the head restraint.

3. Attach the tether strap hook of the child restraint to

the top tether anchorage as shown in the diagram.

Rear Seat Tether Strap Mounting (Second Row

Anchorage Shown)

2

THINGS TO KNOW BEFORE STARTING YOUR VEHICLE

113

-------------------------------------------------------------------------------------------------------------------------------------------------------------

4. Remove slack in the tether strap according to the child

restraint manufacturer’s instructions.

WARNING!

• An incorrectly anchored tether strap could lead to

increased head motion and possible injury to the
child. Use only the anchorage position directly
behind the child seat to secure a child restraint top
tether strap.

• If your vehicle is equipped with a split rear seat,

make sure the tether strap does not slip into the
opening between the seatbacks as you remove
slack in the strap.

Transporting Pets

Air Bags deploying in the front seat could harm your pet.
An unrestrained pet could be thrown about and possibly
injured, or injure a passenger during panic braking or in
a collision.

Pets should be restrained in the rear seat in pet harnesses
or pet carriers that are secured by seat belts.

LATCH Anchorages (Third Row 60/40 Anchorage

Shown)

114

THINGS TO KNOW BEFORE STARTING YOUR VEHICLE

-------------------------------------------------------------------------------------------------------------------------------------------------------------

COMMERCIAL CARGO VEHICLES (NO FACTORY
INSTALLED REAR SEATS) — IF EQUIPPED

Commercial cargo vehicles are not designed for use as a
family vehicle and are not intended for carrying children
in the front passenger seat. However, if you must carry a
child in a vehicle without a rear seat, the passenger seat
should be moved to the full rearward position and the
child must be in a proper restraint system based on its
age, size and weight.

WARNING!

Rearward-facing infant restraints must never be se-
cured in the passenger seat of a vehicle with a
passenger Air Bag. In a collision, a passenger Air Bag
may deploy causing severe injury or death to infants
riding in rearward-facing infant restraints.

This vehicle is equipped with a child restraint tether
anchor located on the lower rear of the front passenger
seat. Use this tether anchor to secure only forward-
facing child restraints equipped with an upper tether
strap.

Commercial Child Restraint Tether Anchor

2

THINGS TO KNOW BEFORE STARTING YOUR VEHICLE

115

-------------------------------------------------------------------------------------------------------------------------------------------------------------


Content      ..     5      6      7      8     ..