Chrysler 300M, Dodge Interpid. Manual - part 371
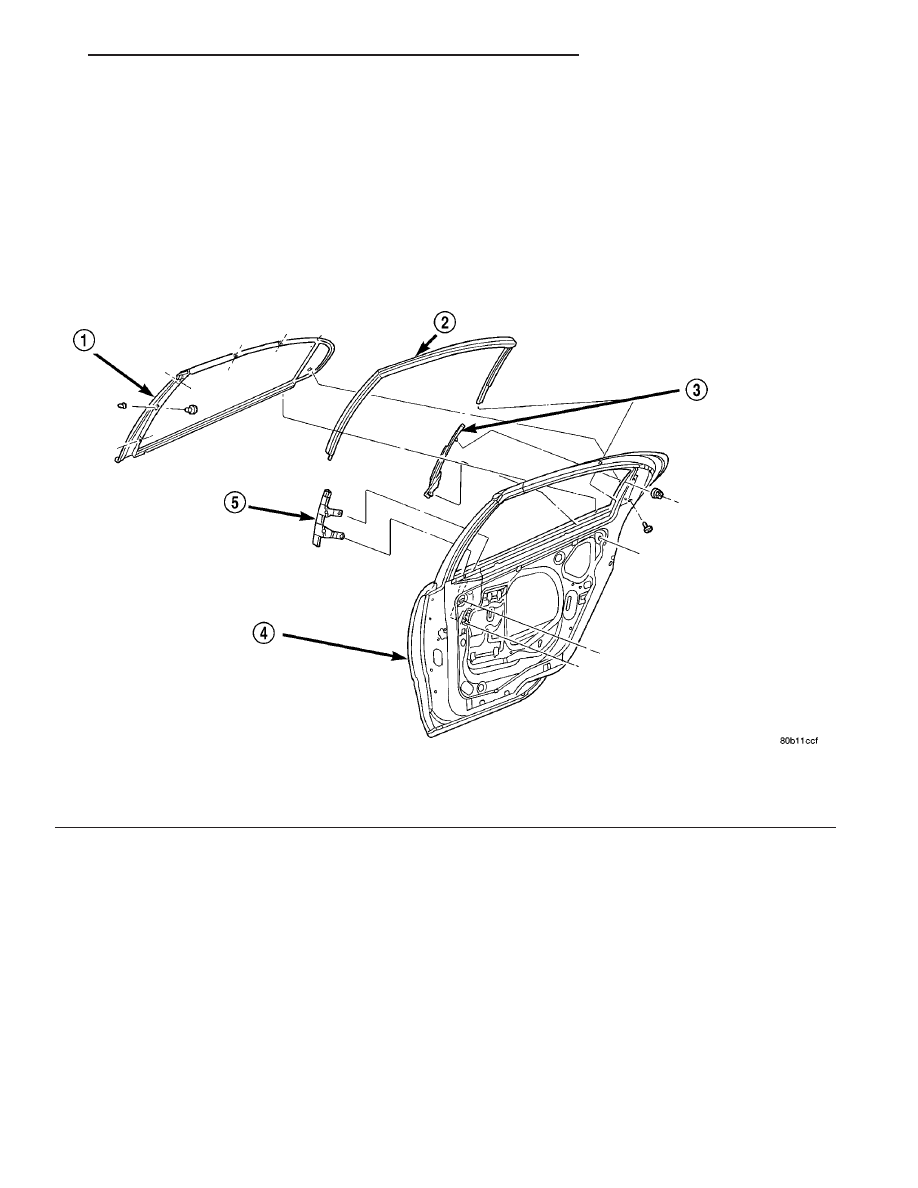
REAR DOOR GLASS RUN
WEATHERSTRIP
REMOVAL
(1) Remove door glass (Refer to 23 - BODY/
DOORS - REAR/DOOR GLASS - REMOVAL).
(2) Pull weatherstrip from lower rear channel
above door latch (Fig. 6).
(3) Pull run weatherstrip from window frame
channel.
INSTALLATION
(1) Clean butyl material from door flange area.
(2) Place door run weatherstrip in position on win-
dow frame channel.
(3) Push door run weatherstrip in position on win-
dow frame channel.
(4) Push weatherstrip into lower rear channel
above door latch.
(5) Install door glass (Refer to 23 - BODY/DOORS
- REAR/DOOR GLASS - INSTALLATION).
Fig. 6 REAR DOOR GLASS RUN
1 - REAR DOOR MOLDING
2 - GLASS RUN
3 - REAR GLASS RUN CHANNEL
4 - REAR DOOR
5 - FRONT GLASS RUN CHANNEL
LH
WEATHERSTRIP/SEALS
23 - 113