Chrysler 300/300 Touring/300C, Dodge Magnum. Manual - part 1689


  Index      Chrysler     Chrysler 300/300 Touring/300C, Dodge Magnum - service repair manual


Search            


Content   ..  1687  1688  1689  1690   ..


Chrysler 300/300 Touring/300C, Dodge Magnum. Manual - part 1689


TIMING CHAIN AND SPROCKETS

REMOVAL

REMOVAL - TIMING CHAIN GUIDE - UPPER

NOTE: When servicing the timing chain guides, both the upper and the lower guide should be replaced in
pairs.

1. Disconnect negative battery cable.

2. Remove the cylinder head cover.

3. Remove the timing chain cover.

4. Remove the upper timing chain guide.

REMOVAL - TIMING CHAIN TENSIONING RAIL

1. Disconnect negative battery cable.

2. Remove cylinder head (Refer to 9 - ENGINE/CYL-

INDER HEAD - REMOVAL).

NOTE: Remove timing case cover carefully. Care
must be taken not to damage oil pan gasket.

3. Remove timing chain cover (Refer to 9 - ENGINE/

VALVE TIMING/TIMING BELT / CHAIN COVER(S)
- REMOVAL).

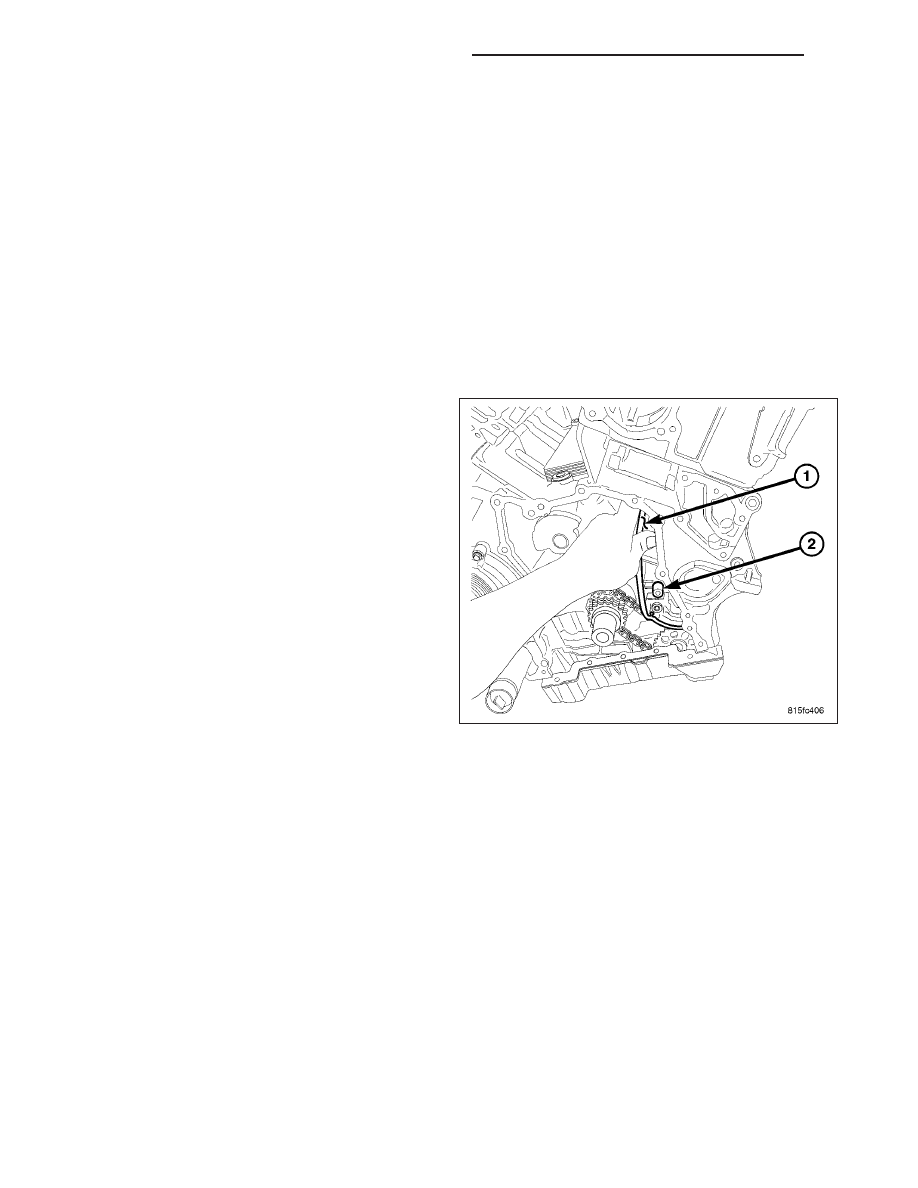
4. Remove tensioning rail from bearing pin

.

REMOVAL - TIMING CHAIN

1. Remove cylinder head cover (Refer to 9 - ENGINE/CYLINDER HEAD/CYLINDER HEAD COVER(S) -

REMOVAL).

NOTE: Cover the timing chain area. Care must be taken not to drop any repair debris or pieces into the
engine when separating the timing chain links.

2. Install special tool # 9525 using two of the cylinder head cover bolts.

9 - 2780

ENGINE - 3.0L TD SERVICE INFORMATION

LX

3. Assemble special tool #9312–1 using 9312– 3 and

9312–4. Install insert #9312–13 and retain with
screw provided..

CAUTION: Care must be taken not to drop the tim-
ing chain plates into the engine once the timing
chain is separated.

NOTE: When installing special tool #9312–1 onto
timing chain link, be sure to back off the smaller
nut of the thrust pin #9312–3 until the pin is
recessed inside of the spindle, #9312–4. Screw the
thrust spindle #9312–4 in until it is seated and
aligned properly over the rivet of the timing chain.

NOTE: When fitting the thrust spindle, ensure that
the thrust pin is positioned at the left timing chain
pin of a chain link.

4. Install special tool #9312 onto timing chain link

.

NOTE: Cover the timing chain area. Care must be
taken not to drop any repair debris or pieces into
the engine when separating the timing chain links.

5. Carefully turn the thrust pin #9312–3 of special tool

#9312–1 clockwise while holding the handle until
the rivet is pressed out and the chain is separated.
Discard the loose link and plates.

NOTE: One whole timing chain link must be
removed.

LX

ENGINE - 3.0L TD SERVICE INFORMATION

9 - 2781

NOTE: Care must be taken not to drop any repair
debris or pieces into the engine when separating
the timing chain links.

6. Connect new timing chain with the oil holes facing

up, and old timing chain with the assembly link,
assembly plate and locking element, and secure.

CAUTION: IT IS ESSENTIAL that the installation
procedure for the timing chain is followed exactly.
Failure to do so will result in severe engine
damage.

INSTALLATION

INSTALLATION - TENSIONING AND SLIDE RAIL

NOTE: Carefully clean all mating surfaces with appropriate solvents to assure that no grease or oil is
present during reassembly.

CAUTION: ENSURE THAT THE SPRING IS CORRECTLY INSTALLED ON THE TENSIONING CLAMP AND
SLIDE RAIL.

1. Install rail on bearing pin.

2. Install timing cover (Refer to 9 - ENGINE/VALVE TIMING/TIMING BELT / CHAIN COVER(S) - INSTALLATION).

9 - 2782

ENGINE - 3.0L TD SERVICE INFORMATION

LX

3. Install oil pan bolts. Tighten M6 bolts to 9N·m (80 lbs.in.) and M8 bolts to 20N·m (15 lbs. ft.).

4. Install cylinder head (Refer to 9 - ENGINE/CYLINDER HEAD - INSTALLATION).

5. Reconnect negative battery cable.

WARNING: USE EXTREME CAUTION WHEN THE ENGINE IS OPERATING. DO NOT STAND IN A DIRECT LINE
WITH THE FAN. DO NOT PUT YOUR HANDS NEAR THE PULLEYS, BELTS OR FAN. DO NOT WEAR LOOSE
CLOTHES.

6. Start the engine, allow to warm, turn engine off and inspect for leaks. Care must be take to observe the fuel

system warning (Refer to 14 - FUEL SYSTEM - WARNING).

INSTALLATION - TIMING CHAIN TENSIONING RAIL

NOTE: Carefully clean all mating surfaces with
appropriate solvents to assure that no grease or
oil is present during reassembly.

1. Install tensioning rail on bearing pin

2. Install timing cover (Refer to 9 - ENGINE/VALVE

TIMING/TIMING

BELT

/

CHAIN

COVER(S)

-

INSTALLATION).

3. Install oil pan and bolts. Tighten M6 bolts to 9N·m

(80 lbs.in.) and M8 bolts to 20N·m (15 lbs. ft.).

4. Install cylinder head (Refer to 9 - ENGINE/CYLIN-

DER HEAD - INSTALLATION).

5. Reconnect negative battery cable.

WARNING: USE EXTREME CAUTION WHEN THE
ENGINE IS OPERATING. DO NOT PUT YOUR
HANDS NEAR THE PULLEYS, BELTS OR FAN. DO
NOT WEAR LOOSE CLOTHES.

6. Start the engine and inspect for leaks. Care must be taken to observe the fuel system warning (Refer to 14 -

FUEL SYSTEM - WARNING).

ADJUSTMENTS

INSTALLATION - TIMING CHAIN

CAUTION: IT IS ESSENTIAL that the installation procedure is followed exactly. Failure to do so will result in
severe engine damage.

CAUTION: Cover timing case recesses to prevent foreign material from entering engine.

1. Connect new timing chain, oil hole side up and old timing chain with the assembly link, the assembly plate and

the assembly locking element, and secure.

LX

ENGINE - 3.0L TD SERVICE INFORMATION

9 - 2783


Content   ..  1687  1688  1689  1690   ..