Chery Tiggo. Manual - part 382
Removal & Installation
1. Disconnect the negative battery cable.
2. Evacuate the A/C system (See A/C System Evacuation and Recharge in Section 13 Heating & Air Conditioning).
3. Remove the front bumper (See Front Bumper Removal & Installation in Section 15 Body & Accessories).
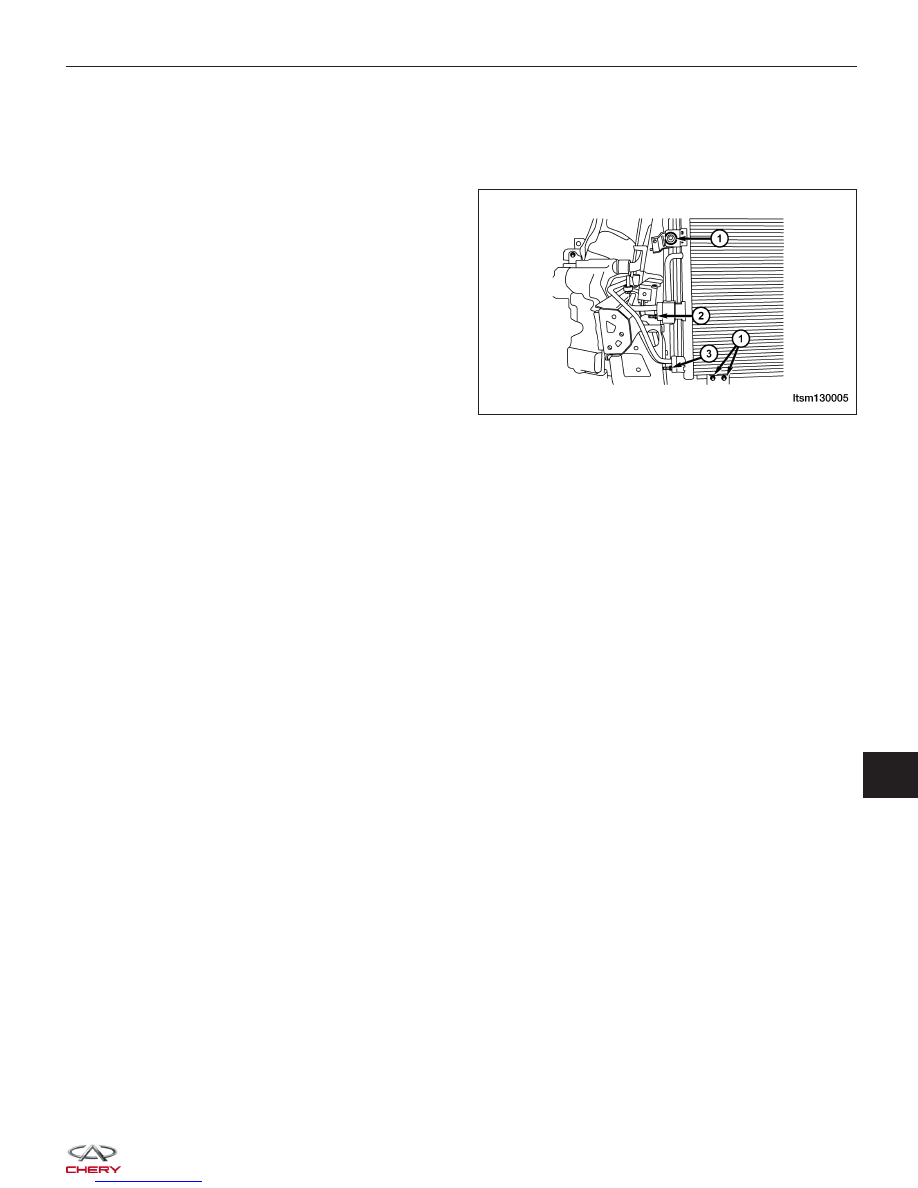
4. Remove the nut (3) that secures the A/C high-pres-
sure liquid line to the A/C condenser. Remove and
discard the O-ring seal and gasket.
NOTE: After removing the A/C lines, plug the A/C
lines to prevent any debris from entering the A/C
system.
5. Remove the nut (2) that secures the A/C high-pres-
sure gas line to the A/C condenser. Remove and
discard the O-ring seal and gasket.
6. Remove the condenser mounting bolts (1).
7. Remove the condenser from the engine compartment.
8. Installation is in the reverse order of removal.
Installation Notes:
• Lubricate new rubber O-ring seals with clean refrigerant oil and install them and new gaskets onto the refriger-
ant line fittings.
• Use only the specified O-rings as they are made of a special material for the R-134a system.
• Use only refrigerant oil of the type recommended for the A/C compressor in the vehicle.
• Recharge the A/C system (See A/C System Evacuation and Recharge in Section 13 Heating & Air Condition-
ing).
Accumulator
Description
The accumulator is connected directly between the condenser and the expansion valve. Accumulator is used on sys-
tems that use an orifice tube to meter refrigerants into the evaporator.
Operation
The primary function of the accumulator is to isolate the compressor from any damaging liquid refrigerant. The accu-
mulator removes debris and moisture from the air conditioning system.
Removal & Installation
1. Disconnect the negative battery cable.
2. Evacuate the A/C system (See A/C System Evacuation and Recharge in Section 13 Heating & Air Conditioning).
ON-VEHICLE SERVICE
LTSM130005
13