Chery QQ6 (S21) / S12LHD. Manual - part 137


  Index      Chery     Chery QQ6 (S21) / S12LHD - service repair manual


Search            


Content   ..  135  136  137  138   ..


Chery QQ6 (S21) / S12LHD. Manual - part 137


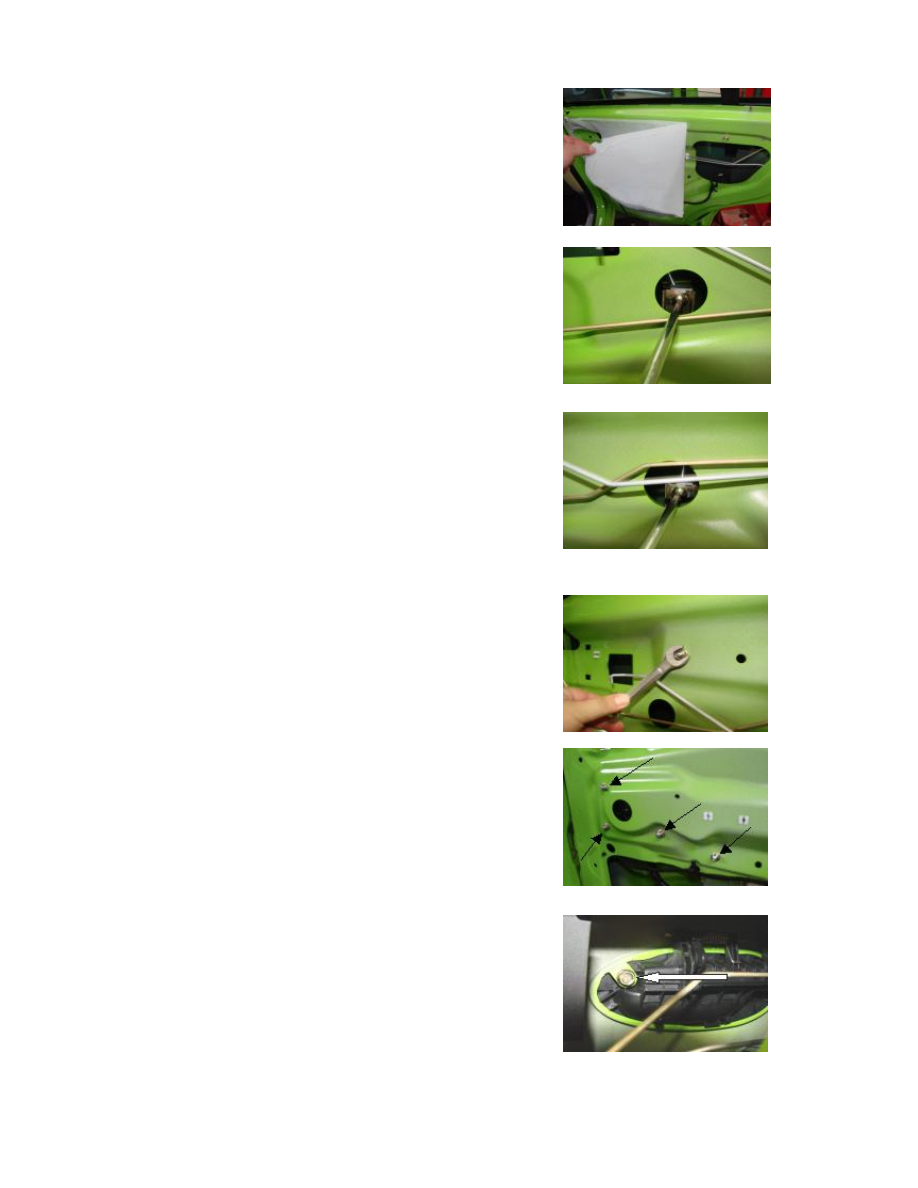
4.9. Tear off the anti-water plastic sheeting on the rear door. 


4.10.  Connect  the  battery,  lower  the  window  glass  to  a  proper 
position  and  loosen  off  the  two  screws  that  fix  the  glass,  and  then 
carefully diassemble the glass. 


4.11.  Use  a  10#  wrench  to  loosen  off  the  five  screws  that  fix  the 
window up-down regulator and remove it. 


4.12.  Use  a  10#  sleeve  wrench  to  loosen  off  the  screw  that  fix  the 
handle outside the rear door and then remove it. 


4.13.  Use  a  cross  head  screwdriver  to  loosen  off  the  three  screws 
that fix the rear door lock core and then remove it. 


4.14. Use a 13# sleeve  wrench to loosen  off  the  four screws (at the 
hinge) that fix the right-rear vehicle door and then remove it. 


5. Installation Steps 

The installation steps are reverse to those for removal.   
Note: Removal of the left-rear door is similar to that of the right-rear 
door. 


Chapter IV Removal, Installation & Maintenance of Front/Rear 

Bumper 

I.  Removal,  Installation  &  Maintenance  of 
Front Bumper 

1. Preparations 

Tools:  8#  wrench,  8#sleeve,  cross  head  screwdriver,  flat  head 
screwdriver 
Spare parts: disposable clips 

2. Notes 

2.1.  Please  wear  necessary  labor  protection  supplies  to  avoid 
accidents. 
2.2. Try to avoid scratching the painted surface of the bumper during 
the removal operation. 
2.3.  For  removal  in  colder  environment,  operate  gently  to  avoid 
damaging the bumper.   

3. Removal Steps 

(Take the left side as an example) 
3.1 Open the Front Hood.   
3.2  Remove  the  headlights.  (See  Removal  and  Installation  of 
Headlights) 
3.3 Use a cross head screwdriver to loosen off the four screws on the 
grid fence. 
 
 
3.4.  Use  a  8#  sleeve  wrench  to  loosen  off  the  two  bolts  on  the 
bumper and the left wing sheet.   
Torque: 11N·m 


3.5. Use a cross  head screwdriver to loosen  off the 7 screws  on the 
bumper and the front compartment member. 


3.6. Use a 8# sleeve wrench and a cross head screwdriver to loosen 
off  the  screws  and  fixing  screws  below  the  mud  fender  and  the 
bumper. 
Installation Torque: 2±0.5 Nm 


3.7 Raise the vehicle with a hoister.   
3.8.  Use  a  cross  head  screwdriver  and  8#sleeve  to  loosen  off  the 
fixing bolts and the screws below the mud fenderand the bumper.   
Installation Torque: 2±0.5N.m 


3.9. Pull off the fog lights connector.   


3.10. Remove the bumper. 


Content   ..  135  136  137  138   ..