Audi TT (2007 year). Manual - part 60


  Главная      Audi     Audi TT (2007 year) (4-cylinder TDI engine (2.0 ltr. 4-valve common rail), mechanics Engine ID CBB) - Workshop Manual


поиск по сайту            


содержание   ..  58  59  60  61   ..


Audi TT (2007 year). Manual - part 60


Protected by copyright. Copying for private or commercial purposes, in part or in whole, is not 
 permitted unless authorised by AUDI AG. AUDI AG does not guarantee or accept any liability 
     with respect to the correctness of information in this document. Copyright by AUDI AG.

Procedure
– Detach heat shield sleeve.
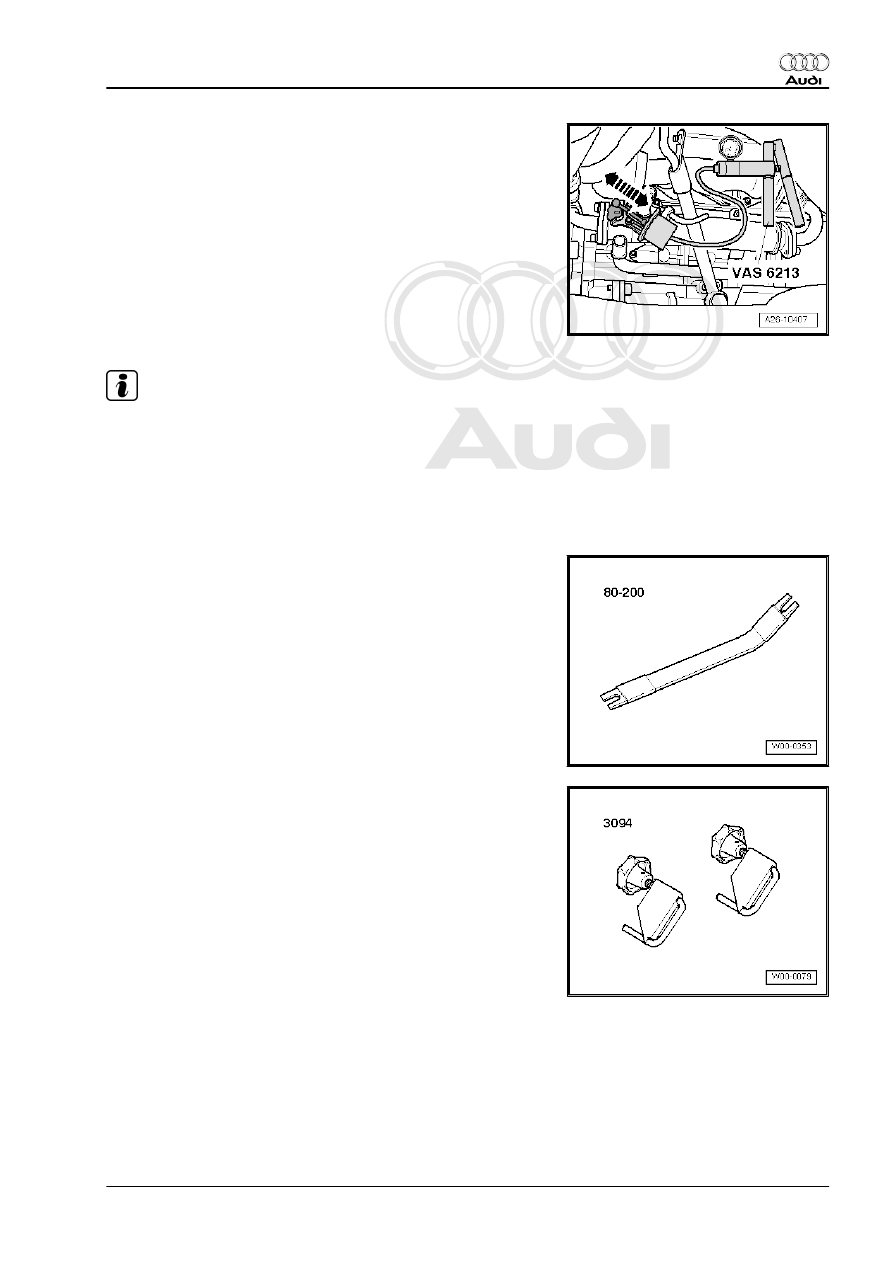
– Disconnect vacuum hose from vacuum unit and connect hand

vacuum pump -VAS 6213- in its place.

– Operate hand vacuum pump to produce a vacuum.
• The linkage of the exhaust gas recirculation cooler change-

over should move -arrows-.

If the linkage does not move or only moves jerkily:
♦ The vacuum unit is defective.
♦ The change-over flap for exhaust gas recirculation is sticking.

Note

Secure the heat insulation sleeve in the original position when

installing.

3.5

Removing and installing exhaust gas re‐

circulation cooler

Special tools and workshop equipment required
♦ Removal lever -80 - 200-

♦ Hose clamps for hoses up to 25 mm -3094-

3. Exhaust gas recirculation system    

231

Protected by copyright. Copying for private or commercial purposes, in part or in whole, is not 
 permitted unless authorised by AUDI AG. AUDI AG does not guarantee or accept any liability 
     with respect to the correctness of information in this document. Copyright by AUDI AG.

♦ Hose clip pliers -V.A.G 1921-

♦ Drip tray for workshop hoist -VAS 6208-

Removing
– Remove particulate filter 

⇒ page 218

 .

selector lever -1- and pull cable off pin -arrow-.

Metal gate relay lever:
– Detach securing clip -4- for gate selector cable from gate relay

lever -2- and pull cable off pin -arrow-.

Plastic gate relay lever:
• To prevent damage to gate selector cable, cable end-piece

must be detached from gate selector cable before removing.

– Pull locking device forwards onto stop -arrow 1- and lock by

turning anti-clockwise -arrow 2-.

– Press gate relay lever towards front -arrow 3-.

232

Protected by copyright. Copying for private or commercial purposes, in part or in whole, is not 
 permitted unless authorised by AUDI AG. AUDI AG does not guarantee or accept any liability 
     with respect to the correctness of information in this document. Copyright by AUDI AG.

All vehicles (continued):
– Remove cable support bracket -arrows- from gearbox and

place to one side (selector cables remain fitted).

– Remove nuts -2- and bolts -3-.
– Detach exhaust gas recirculation pipe.

Note

Disregard -item 1-.

– Place drip tray for workshop hoist -VAS 6208- beneath engine.
– Clamp off coolant hoses using hose clamps -3094- , release

hose clips -arrows- and disconnect coolant hoses from ex‐

haust gas recirculation cooler.

– Detach heat insulation sleeve from vacuum unit.

3. Exhaust gas recirculation system    

233

Protected by copyright. Copying for private or commercial purposes, in part or in whole, is not 
 permitted unless authorised by AUDI AG. AUDI AG does not guarantee or accept any liability 
     with respect to the correctness of information in this document. Copyright by AUDI AG.

– Remove bolts -1- for exhaust gas recirculation pipe.
– Disconnect vacuum hose -2- from vacuum unit and move

clear.

– Remove bolts -arrows- and detach exhaust gas recirculation

cooler.

Installing
• Tightening torque 

⇒ page 227

 .

Installation is carried out in the reverse order; note the following:

Note

Renew gaskets, seals and self-locking nuts.

Secure all hose connections with the correct type of hose clips

(same as original equipment) ⇒  Electronic parts catalogue .

Fit heat insulation sleeve in the original position when instal‐

ling.

⇒ page 218

 .

– Check coolant level 

⇒ page 169

 .

234


содержание   ..  58  59  60  61   ..