Acura RSX Honda Integra. Manual - part 314


  Index      Acura     Acura RSX Honda Integra - service repair manual 2002-2006 year


Search            


Content   ..  312  313  314  315   ..


Acura RSX Honda Integra. Manual - part 314


*01

*03

*02

S6M6A02E10411310041LDAT00

Special Tools Required

14-382

Shafts and Clutches

Clutch Reassembly

A

B

B

A

C

D

A

B

• Clutch spring compressor attachment

07LAE-PX40100 or 07HAE-PL50101

• Clutch spring compressor bolt assembly

07GAE-PG40200 or 07GAE-PG4020A

1. Soak the clutch discs thoroughly in ATF for a

minimum of 30 minutes.

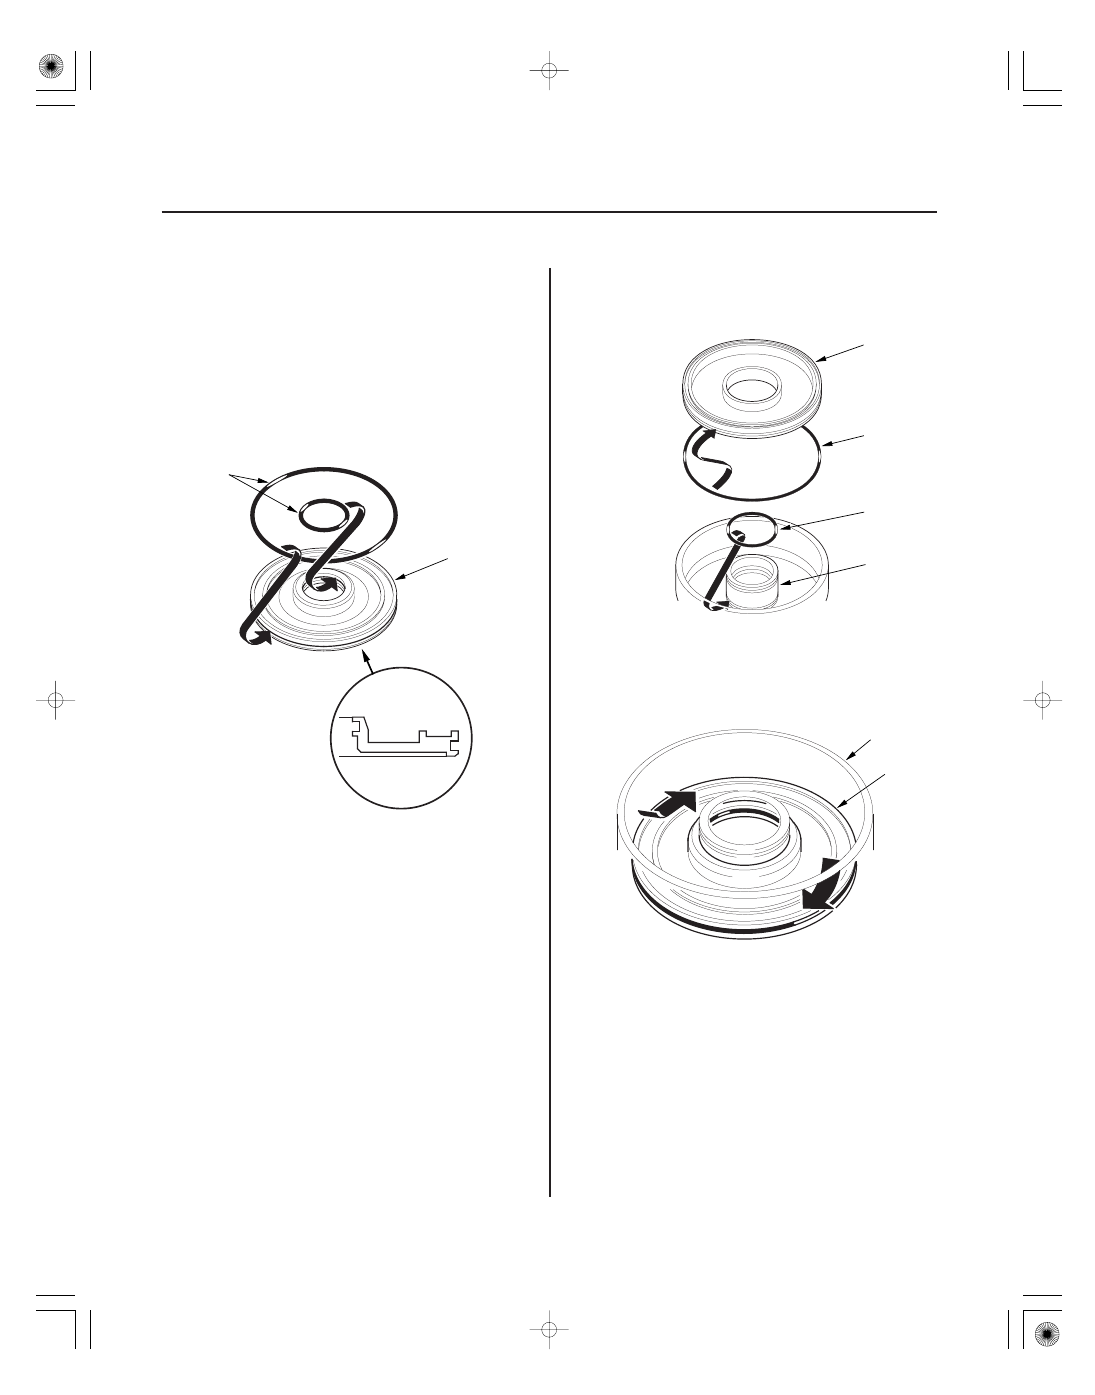
2. Install the new O-rings (A) on the 4th and 5th clutch

piston (B).

3. Install the new O-ring (A) in the 1st, 2nd, and 3rd

clutch pistons (B), and install the new O-ring (C) on
the clutch drums (D).

4. Install the clutch piston (A) in the clutch drum (B).

Apply pressure and rotate to ensure proper seating.
Lubricate the piston O-ring with ATF before
installing. Do not pinch the O-ring by installing the
piston with to much force.

05/06/27 17:59:36 61S6M040_140_0383

04

07

06

05

14-383

C

B

A

07LAE-PX40100

07LAE-PX40100 or
07HAE-PL50101

07GAE-PG40200 or
07GAE-PG4020A

A

B

C

A

B

5. Install the return spring (A) and spring retainer (B),

and position the snap ring (C) on the retainer.

6. Install the special tools.

7. Set the special tool (A) on the spring retainer (B) of

the 1st, 2nd, and 3rd clutches so the special tool
works on the clutch return spring (C).

8. Be sure the special tool (A) is adjusted to have full

contact with the spring retainer (B) on the 4th and
5th clutches.

(cont’d)

05/06/27 17:59:36 61S6M040_140_0384

07

08

08

02

14-384

Shafts and Clutches

Clutch Reassembly (cont’d)

E

D

C

A

B

9. If either end of the special tool is set over an area of

the spring retainer which is unsupported by the
return spring, the retainer may be damaged.

10. Compress the return spring.

11. Install the snap ring with snap ring pliers.

12. Remove the special tools.

13. Install the waved spring (A) in the 1st clutch drum

(B). Starting with the clutch waved-plate,
alternately install the clutch plate (C) (4) and discs
(D) (4), then install the clutch end plate (E) with the
flat side toward the disc.

05/06/27 17:59:37 61S6M040_140_0385

03

04

05

06

14-385

A

B

C

D

E

F

F

E

D

C

A

B

A

B

C

D

E

A

B

C

D

E

14. Install the waved spring (A) in the 2nd clutch drum

(B). Install the clutch flat-plate (C), then starting
with the clutch disc, alternately install the clutch
disc (D) (4) and waved-plates (E) (3), then install the
clutch end plate (F) with the flat side toward the
disc.

15. Install the waved spring (A) in the 3rd clutch drum

(B). Install the clutch flat-plate (C), then starting
with the clutch disc, alternately install the clutch
disc (D) (4) and waved-plates (E) (3), then install the
clutch end plate (F) with the flat side toward the
disc.

16. Install the waved spring (A) in the 4th clutch drum

(B). Starting with the clutch waved-plate,
alternately install the clutch plate (C) (3) and discs
(D) (3), then install the clutch end plate (E) with the
flat side toward the disc.

17. Install the waved spring (A) in the 5th clutch drum

(B). Starting with the clutch waved-plate,
alternately install the clutch plate (C) (3) and discs
(D) (3), then install the clutch end plate (E) with the
flat side toward the disc.

(cont’d)

05/06/27 17:59:38 61S6M040_140_0386


Content   ..  312  313  314  315   ..