Land Rover Engine 2.0 Litre T Series. Manual - part 14
ENGINE
OVERHAUL
41
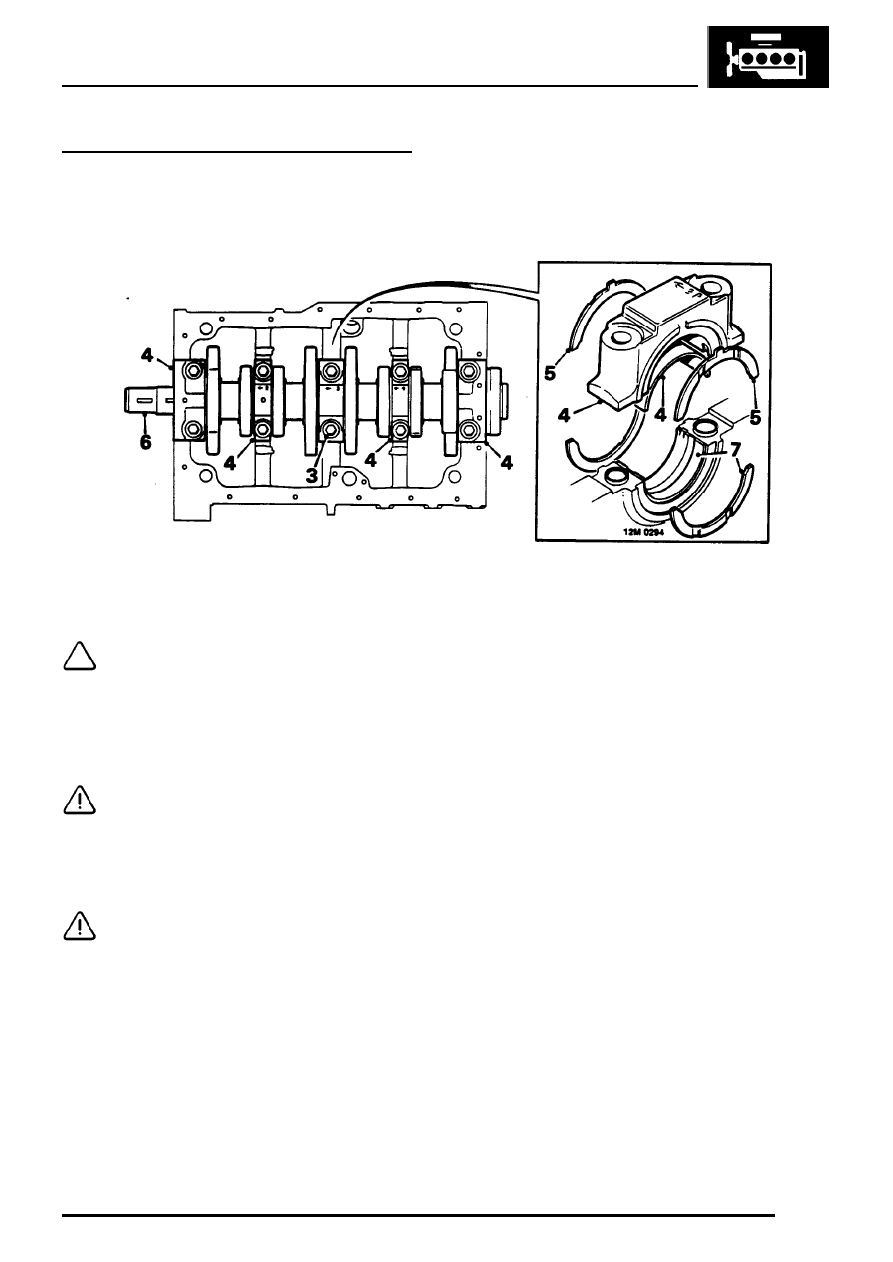
Crankshaft - remove
1. Remove big-end bearings.
2. Remove holding tool LRT-12-059.
NOTE: Ensure that main bearing caps are
numbered 1 to 5 and that arrow denoting
FRONT is cast on each cap.
3. Starting at centre main bearing cap and
working outwards, progressively slacken then
remove 10 main bearing cap bolts.
CAUTION: Keep bearing cap bolts in their
fitted order.
4. Remove 5 main bearing caps and main
bearing shells; discard shells.
CAUTION: Do not knock bearing caps
sideways to remove them or locating
dowels will be damaged.
5. Recover 2 thrust washer halves from centre
main bearing cap. Discard thrust washers if
crankshaft end-float exceeded specified figure.
6. Using assistance, lift crankshaft from cylinder
block.
7. Remove 5 main bearing shells and 2 thrust
washer halves. Discard thrust washers if
crankshaft end-float exceeded specified limits;
discard bearing shells.
8. Remove 2 Woodruff keys from crankshaft.
9. Clean crankshaft, blow out oil passages.
10. Clean bearing shell recesses and mating
surfaces of cylinder block.
11. Clean main bearing caps.